By: CS2103Aug2017 T17-B1 Since: Sep 2017 Licence: MIT
Table of Contents
- 1. About
- 2. Introduction
- 3. Quick Start
- 4. Features
- 4.1. Logging into the address book application using Command Line Interface (CLI) :
login - 4.2. Logging into the address book application using Graphic User Interface (GUI):
login - 4.3. Logging out of the address book application :
logout - 4.4. Viewing help :
help - 4.5. Adding a debtor:
add - 4.6. Listing all persons :
list - 4.7. Listing all blacklisted persons :
blacklist - 4.8. Listing all whitelisted persons :
whitelist - 4.9. Listing all persons with overdue debt:
overduelist - 4.10. Editing a person :
edit - 4.11. Locating persons by name:
find - 4.12. Increasing the debt of a debtor:
borrow - 4.13. Decreasing the debt of a person:
payback - 4.14. Resetting the debt of a person:
repaid - 4.15. Deleting a person :
delete - 4.16. Banning a debtor :
ban - 4.17. Unbanning a blacklisted person :
unban - 4.18. Selecting a person :
select - 4.19. Selecting a nearby person:
nearby - 4.20. Listing entered commands :
history - 4.21. Sorting all contacts :
sort - 4.22. Filter contacts by tags :
filter - 4.23. Undoing previous command :
undo - 4.24. Redoing the previously undone command :
redo - 4.25. Setting the path to local profile pictures folder :
setpath - 4.26. Adding a profile picture to a person :
addpic - 4.27. Deleting the profile picture of a person :
delpic - 4.28. Clearing all entries :
clear - 4.29. Changing themes:
theme - 4.30. Exiting the program :
exit - 4.31. Saving the data
- 4.32. Loading the data
- 4.1. Logging into the address book application using Command Line Interface (CLI) :
- 5. Non-command features
- 6. FAQ
- 7. Command Summary
- 8. Current features
- 9. Features to be included by
V2.0
1. About
This user guide gives you an overview of how to use Codii. This guide includes step-by-step instructions on how each command work, FAQs and a summary of every command you will learn.
The terms used in this guide are as follows:
-
Blacklist - List of people who are banned
-
Whitelist - List of people who have cleared their debts
-
Overdue list - List of people who have overdue debt
-
Index - The ordering of a contact in the list
-
Cluster - The general location of a person based on [postal districts]
2. Introduction
Codii is a free-to-use address book catered to suit the needs of debt collectors. You can enter debtors into Codii, track the amount of debt owed, manage deadlines, ban and unban debtors and even organise them by location.
Codii is available for the Linux, Windows, and Mac OS operating systems.
3. Quick Start
-
Ensure you have Java version
1.8.0_60or later installed in your Computer.Having any Java 8 version is not enough.
This app will not work with earlier versions of Java 8. -
Download the latest
codii.jarhere. -
Copy the file to the folder you want to use as the home folder for your Codii.
-
Double-click the file to start the app. The GUI, as seen in Figure 1.1 below, should appear in a few seconds.
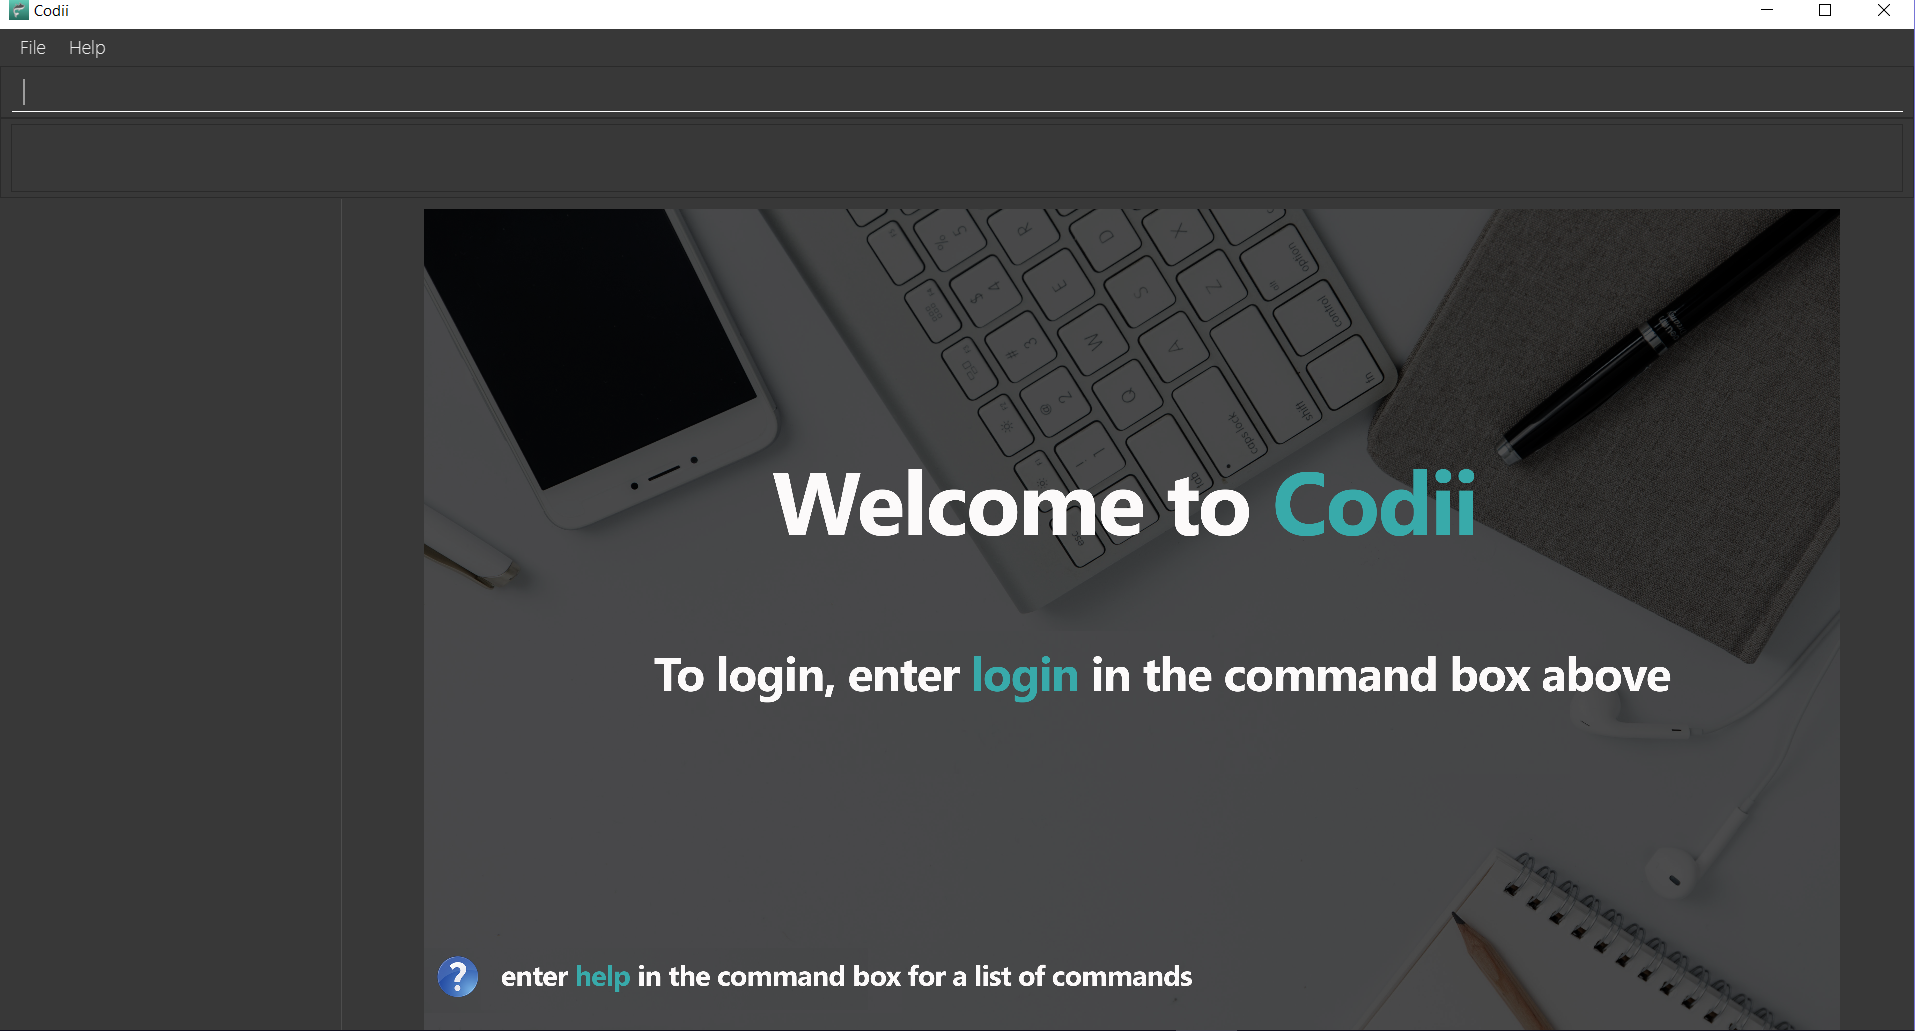
Figure 1.1 : Codii login page
-
Log into the app using the format specified in the welcome screen. The application should look similar to Figure 1.2 after clicking on a person in the left panel.
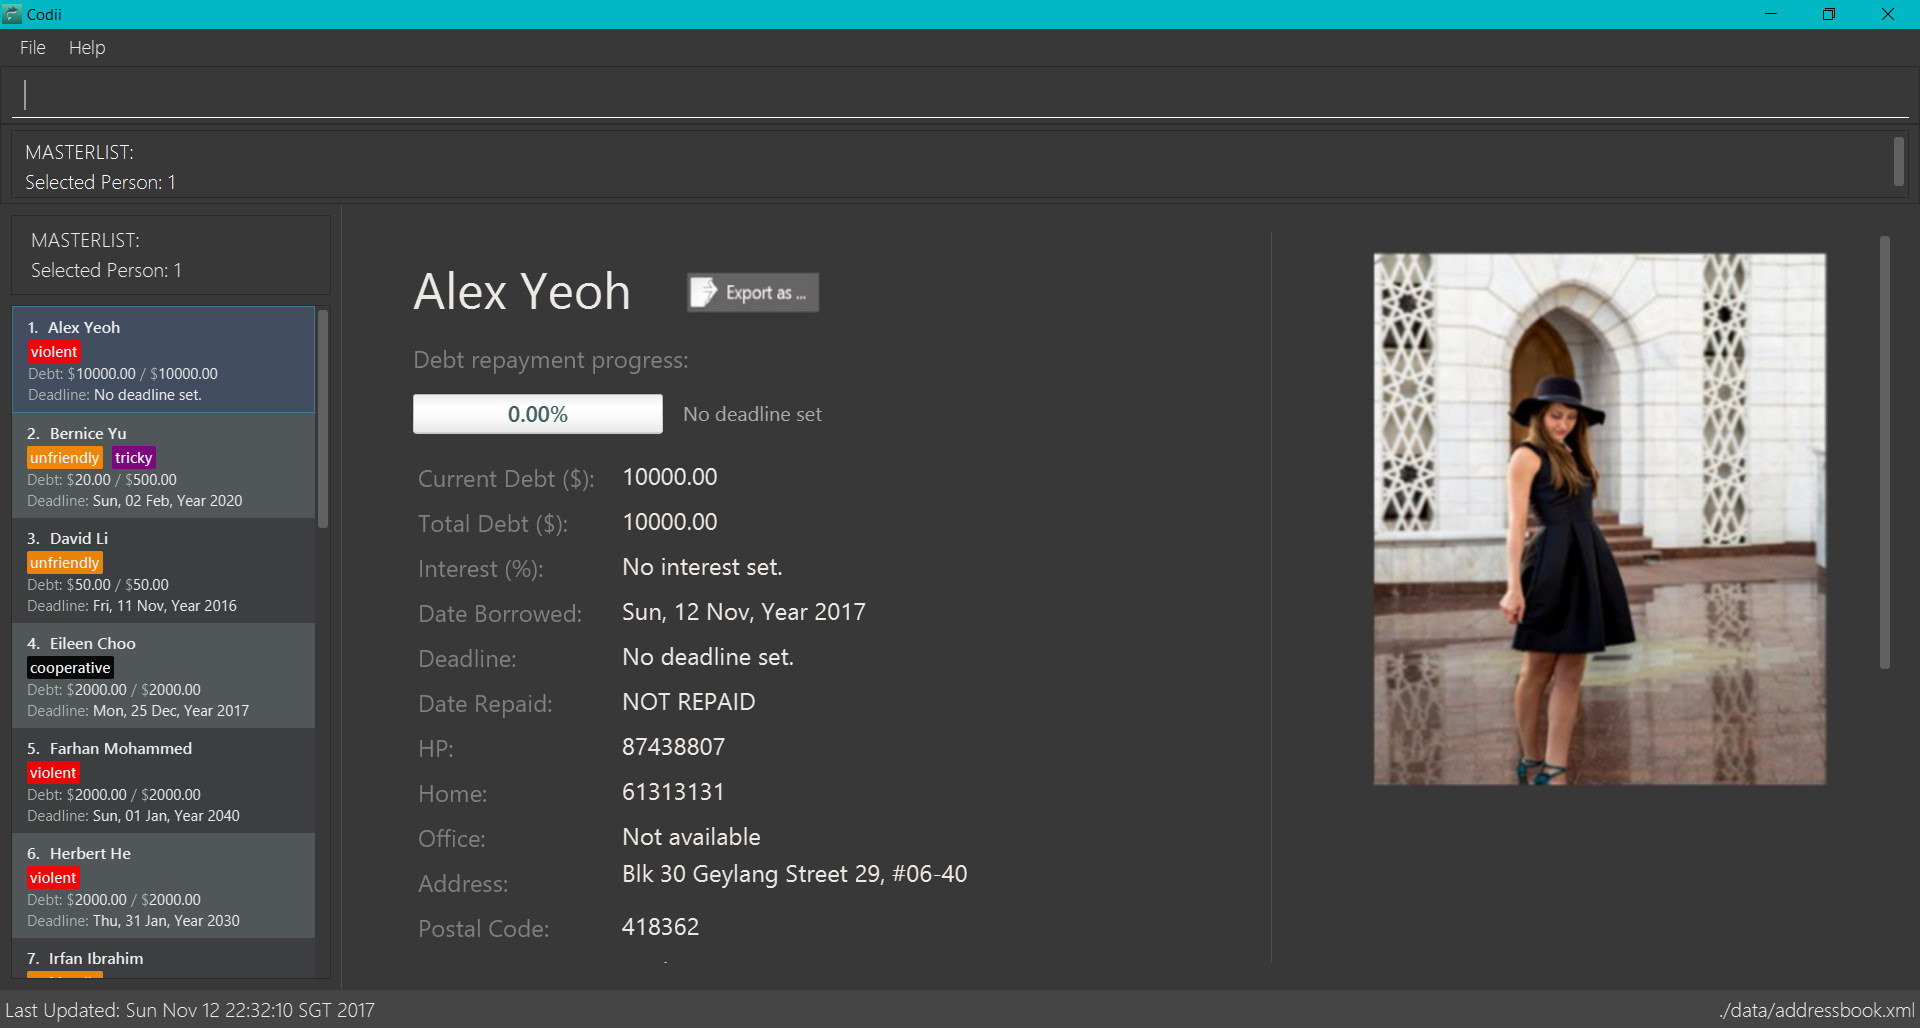
Figure 1.2 : Full information of the person that is selected in the left panel
-
Type the command in the command box and press Enter to execute it.
e.g. typinghelpand pressing Enter will open the help window. -
Some example commands you can try:
-
list: lists all contacts -
addn/John Doe hp/98765432 home/60773707 e/johnd@example.com a/John street, block 123, #01-01 pc/321123 d/123 dl/11-12-2018: adds a contact namedJohn Doeto the Address Book. -
delete3: deletes the 3rd contact shown in the current list -
exit: exits the app
-
-
Refer to the Features section below for details of each command.
4. Features
Command Format
-
Words in
UPPER_CASEare the parameters to be supplied by the user e.g. inadd n/NAME,NAMEis a parameter which can be used asadd n/John Doe. -
Items in square brackets are optional e.g
n/NAME [t/TAG]can be used asn/John Doe t/friendor asn/John Doe. -
Items with
… after them can be used multiple times including zero times e.g.[t/TAG]…can be used ast/friend,t/friend t/familyetc. -
Parameters can be in any order e.g. if the command specifies
n/NAME hp/HANDPHONE_NUMBER,hp/HANDPHONE_NUMBER n/NAMEis also acceptable.
4.1. Logging into the address book application using Command Line Interface (CLI) : login
Logs into the address book.
Format: login USERNAME PASSWORD
|
It is advisable to use the GUI login instead of the CLI login. The current implementation for password masking in the CLI login is less sophisticated than the GUI login. This can lead to unexpected or incorrect behaviors such as inconsistent masking of password or being unable to log in when username and password are entered correctly. To reduce unexpected behaviors, users are advised to add or delete characters from the end of the command only. The CLI login option is available for convenience only given that we want the user to be able to accomplish tasks faster using CLI than a GUI. |
Examples:
-
login userAcc_123 pa$$_Word!@#& -
login batMan_111 (Batcave.327+-)
|
Sample account to log into address book: Username: loanShark97 Password: hitMeUp123 |
4.2. Logging into the address book application using Graphic User Interface (GUI): login
Logs into the address book.
Format: login
1) Type login and press Enter in the command box. You should see the same welcome page as shown in Figure 1.3.
2) Enter username and password in the respective fields.
3) Press Enter or click the Log in button.
To return to the command box, click the Back to command box button.
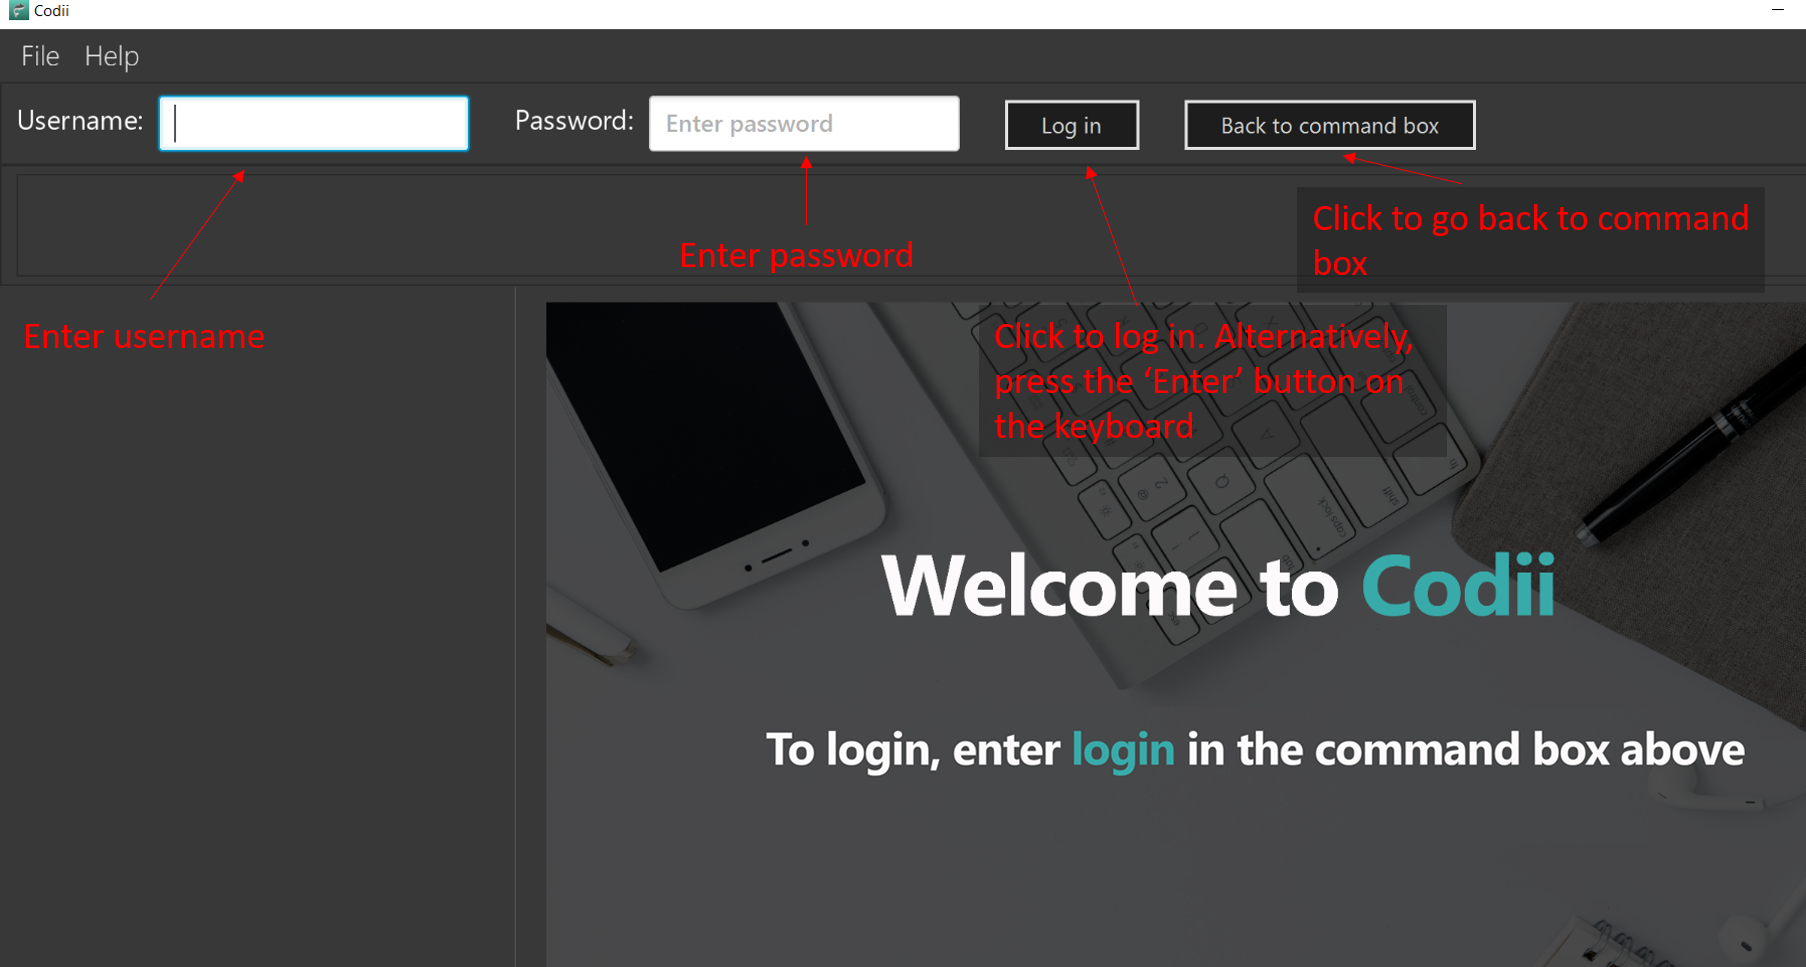
Figure 1.3 : How the welcome screen looks like after login is entered in the command box
|
Sample account to log into address book: Username: loanShark97 Password: hitMeUp123 |
4.3. Logging out of the address book application : logout
Logs out of the address book.
Format: logout
4.4. Viewing help : help
Format: help
4.5. Adding a debtor: add
Adds a debtor to the address book. Date borrowed for debtor is automatically
noted down. The Office phone, Deadline, Interest and Tag fields are optional.
Format: add n/NAME hp/HANDPHONE_NUMBER home/HOME_PHONE_NUMBER e/EMAIL a/ADDRESS pc/POSTAL_CODE d/DEBT [op/OFFICE_PHONE_NUMBER] [dl/DEADLINE] [int/INTEREST] [t/TAG]…
| A debtor can have any number of tags (including 0) |
Examples:
-
add n/John Doe hp/98765432 home/60773707 op/60073007 e/johnd@example.com a/John street, block 123, #01-01 pc/321123 d/123 dl/11-11-2018 -
add n/Betsy Crowe t/friend e/betsycrowe@example.com a/Newgate Prison hp/81234567 home/61018123 pc/000001 d/1234 t/criminal
4.6. Listing all persons : list
Shows a list of all persons in the address book.
Format: list
4.7. Listing all blacklisted persons : blacklist
Shows a list of all blacklisted persons in the address book.
Format: blacklist
4.8. Listing all whitelisted persons : whitelist
Shows a list of all whitelisted persons in the address book.
Format: whitelist
4.9. Listing all persons with overdue debt: overduelist
It should be noted that each time the user logs into Codii, it checks through the address book for debtors
whose deadlines have been passed and automatically adds them into the overdue list. |
|
If any debtor in the overdue list has cleard his/her debt, they are removed from the overdue list. |
Shows a list of all persons with overdue debt in the address book.
Format: overduelist
4.10. Editing a person : edit
Edits an existing debtor, blacklisted/whitelisted contact in the address book.
Format: edit [INDEX] [n/NAME] [hp/HANDPHONE_NUMBER] [home/HOME_PHONE_NUMBER] [op/OFFICE_PHONE_NUMBER] [e/EMAIL] [a/ADDRESS] [pc/POSTAL_CODE] [d/DEBT] [td/TOTAL DEBT] [dl/DEADLINE] [int/INTEREST] [t/TAG]…
Examples:
-
edit 1 p/91234567 pc/333111 e/johndoe@example.com
Edits the phone number, postal code, and email address of the 1st person to be91234567,333111, andjohndoe@example.comrespectively. -
edit 2 n/Betsy Crower t/
Edits the name of the 2nd person to beBetsy Crowerand clears all existing tags. -
list
select 1
edit n/Peeta Pen
Edits the name of the 1st person in the address book to bePeeta Pen.
4.11. Locating persons by name: find
Finds persons whose names contain any of the given keywords.
Format: find KEYWORD [MORE_KEYWORDS]
Examples:
-
find John
ReturnsjohnandJohn Doe -
find Betsy Tim John
Returns any person having namesBetsy,Tim, orJohn
4.12. Increasing the debt of a debtor: borrow
Increases the debt of a debtor by the amount entered.
Format: borrow [INDEX] AMOUNT
Examples:
-
borrow 1 500
Increases the debt of the 1st person by $500. -
borrow 2 1000.10
Increases the debt of the 2nd person by $1000.10. -
list
select 2
borrow 234
Increases the debt of the 2nd person by $234.
4.13. Decreasing the debt of a person: payback
Decreases the debt of a person by the amount entered.
Format: payback [INDEX] AMOUNT
Examples:
-
payback 1 500
Decreases the debt of the 1st person by $500. -
payback 2 1000.10
Decreases the debt of the 2nd person by $1000.10. -
list
select 3
payback 234
Decreases the debt of the 3rd person by $234.
4.14. Resetting the debt of a person: repaid
Resets the debt of a person to zero and sets the date repaid field of that person.
Format: repaid [INDEX]
Examples:
-
repaid 1
Resets the debt of the 1st person to zero and sets the date of repayment in his/her record. -
select 2
repaid
Resets the debt of the 2nd person to zero and sets the date of repayment in his/her record.
4.15. Deleting a person : delete
Deletes the specified person from the address book.
Format: delete [INDEX]
Examples:
-
list
delete 2
Deletes the 2nd person in the address book. -
find Betsy
delete 1
Deletes the 1st person in the results of thefindcommand. -
list
select 4
delete
Deletes the 4th person in the address book.
4.16. Banning a debtor : ban
Adds the specified debtor from current records to blacklist.
Format: 'ban [INDEX]'
Examples:
-
list
ban 2
Adds the 2nd person in the address book to blacklist. -
find Betsy
ban 1
Adds the 1st person in the results of thefindcommand to blacklist. -
select 3
ban
Adds the 3rd person in the address book to blacklist.
4.17. Unbanning a blacklisted person : unban
Removes the specified person from blacklist.
Format: 'unban [INDEX]'
Examples:
-
blacklist
unban 2
Removes the 2nd person from blacklist. -
find Betsy
unban 1
Removes the 1st person in the results of thefindcommand from blacklist. -
select 3
unban
Removes the 3rd person in the address book from blacklist.
4.18. Selecting a person : select
Selects the person identified by the index number used in the last person listing.
Format: select [INDEX]
Examples:
-
list
select 2
Selects the 2nd person in the address book. -
find Betsy
select 1
Selects the 1st person in the results of thefindcommand.
select
Selects the first person in the last person listing.
4.19. Selecting a nearby person: nearby
Selects the person identified by the index number used in the listing of nearby contacts of currently selected person,
Format: nearby INDEX
Examples:
-
list
select 2
nearby 1
Selects the 1st person in the sameclusteras the previously selected person.
4.20. Listing entered commands : history
Lists all the commands that you have entered in reverse chronological order.
Format: history
|
Pressing the ↑ and ↓ arrows will display the previous and next input respectively in the command box. |
4.21. Sorting all contacts : sort
Sorts all the contacts in the address book in specified order.
Format: sort [ORDERING]
Examples:
-
sort
Sorts the contacts in the address book by name. -
sort cluster
Sorts the contacts in the address book by their postal districts.
4.22. Filter contacts by tags : filter
Filters contacts in the address book according to the tags specified.
Format: filter TAG1 TAG2 …
Examples:
-
filter friendly
Displays contacts with thefriendlytag. -
filter tricky violent dishonest
Displays contacts who have at least one of these three tags:tricky,violent,dishonest.
4.23. Undoing previous command : undo
Restores the address book to the state before the previous undoable command was executed.
Format: undo
|
Undoable commands: those commands that modify the address book’s content ( |
Examples:
-
delete 1
list
undo(reverses thedelete 1command) -
select 1
list
undo
Theundocommand fails as there are no undoable commands executed previously. -
delete 1
clear
undo(reverses theclearcommand)
undo(reverses thedelete 1command)
4.24. Redoing the previously undone command : redo
Reverses the most recent undo command.
Format: redo
Examples:
-
delete 1
undo(reverses thedelete 1command)
redo(reapplies thedelete 1command) -
delete 1
redo
Theredocommand fails as there are noundocommands executed previously. -
delete 1
clear
undo(reverses theclearcommand)
undo(reverses thedelete 1command)
redo(reapplies thedelete 1command)
redo(reapplies theclearcommand)
4.25. Setting the path to local profile pictures folder : setpath
Sets the folder location to access and import debtors' profile pictures.
Paths should be absolute paths and not relative ones. Also, paths should point to the folder rather than the picture itself.
It is recommended to create a folder and fill it up with the necessary profile pictures for the application. If there is a need to add a new picture, it should be added into this specific folder.
The folder should only contain pictures with the .jpg extension. Moreover, the pictures should be named after the debtors in the application’s database.
For example, for the debtor Alex Yeoh, the name of her picture should be AlexYeoh.jpg
As for the debtor Bernice Yu, the name of her picture should be BerniceYu.jpg
If it is necessary to change the location of the folder, the setpath command should be used again to indicate this change in location of the profile pictures folder.
Format: setpath [PATH]
Examples:
-
setpath C:/Users/acer/Desktop/SE/profilepic/ -
setpath C:/Users/acer/Desktop/SE/profilepic -
setpath C:\Users\acer\Desktop\SE\profilepic\ -
setpath C:\Users\acer\Desktop\SE\profilepic -
setpath out/production/resources/images/ -
setpath out/production/resources/images -
setpath out\production\resources\images\ -
setpath out\production\resources\images
4.26. Adding a profile picture to a person : addpic
Adds a user specified profile picture to the specified person.
A path to the pictures folder must first be set using the setpath command
The picture of the debtor should already be present in this folder and should be named after the debtor himself.
Examples:
Roy Balakrishnan’s picture should be named as RoyBalakrishnan and the extension of the file should be .jpg
Full file name: RoyBalakrishnan.jpg
Herbert He’s picture should be named as HerbertHe and the extension of the file should be .jpg
Full file name: HerbertHe.jpg
Format to add picture to the selected person : 'addpic [INDEX]'
Examples:
-
list
setpath C:\Users\acer\Desktop\SE1\profilepic
addpic 2
Adds a picture to the 2nd person in masterlist. -
find Betsy
setpath C:\Users\acer\Desktop\SE2\profilepic
addpic 1
Adds a profile picture to the 1st person from the results of thefindcommand. -
select 3
setpath C:\Users\acer\Desktop\SE7\profilepic
addpic
Adds a profile picture to the 3rd person from the masterlist in the address book.
4.27. Deleting the profile picture of a person : delpic
Removes the profile picture of the specified person.
Format: 'delpic [INDEX]'
Examples:
-
list
delpic 2
Deletes the picture of the 2nd person in masterlist. -
find Betsy
delpic 1
Deletes the profile picture of the 1st person from the results of thefindcommand. -
select 3
delpic
Deletes the profile picture of the 3rd person from the masterlist in the address book.
4.28. Clearing all entries : clear
Clears all entries from the address book.
Format: clear
4.29. Changing themes: theme
Changes between the two available themes shown below in Figures 4.25.1 and 4.25.2 below.
Format: theme
Figure 4.25.1 : Dark theme (default)
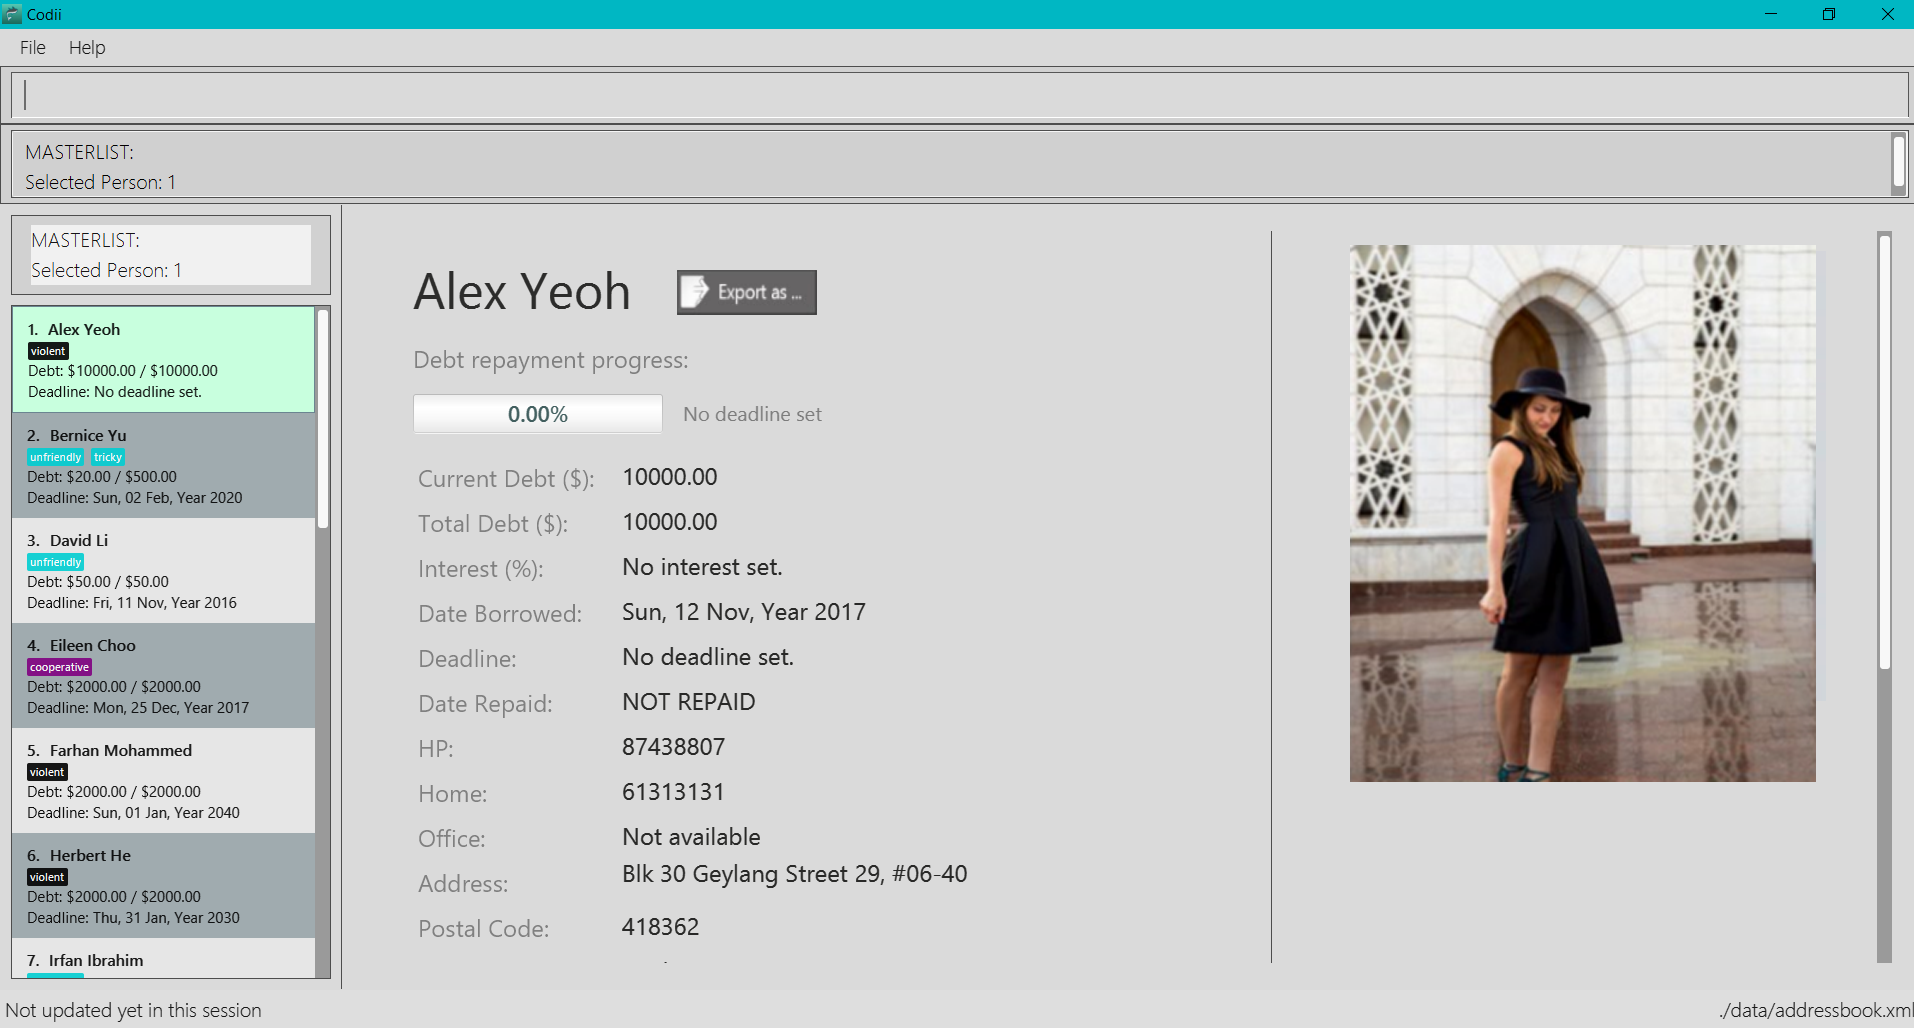
Figure 4.25.2 : Bright theme
4.30. Exiting the program : exit
Exits the program.
Format: exit
4.31. Saving the data
Address book data is saved in the hard disk automatically after any command that changes the data.
There is no need to save manually.
If address book data can be loaded successfully, backup address book data is saved upon starting the program.
4.32. Loading the data
If the data file does not exist or cannot be read:
-
Backup data file will be loaded, if available and readable.
-
If backup data is unavailable:
-
You will be given a sample address book.
-
-
If backup data exists but cannot be read :
-
You will be given an empty address book.
-
|
To quickly revert address book data to the state of last use:
|
5. Non-command features
5.1. Interest Calculator
|
This is only applicable to debtors with a set interest rate. For the current version, only positive whole numbers are accepted. |
Codii only checks through its list of debtors when the user logs into the application. |
At the start of each month, Codii will check through the list of debtors and accrue their debt
if applicable. Even if the user has not logged into Codii for many months, the application will compound
the debt accordingly.
This is convenient for debts or loans with a monthly interest rate.
6. FAQ
Q: How do I transfer my data to another Computer?
A: Install the app in the other computer and overwrite the empty data file it creates with the file that contains the data of your previous address book.
Q: What is the difference between repaid command and payback command?
A: repaid command completely clears a debtor’s debt while payback clears a specified amount. In both cases, when the debt reaches zero, the person is
transferred to whitelist and date repaid is set to the date the command is executed.
Q: If I delete someone from the masterlist, will he/she be deleted from the other lists as well?
A: Yes.
Q: Is it possible to send a blacklisted person to the whitelist?
A: No. You have to unban the person prior to sending him/her to the whitelist.
Q: When will a debtor’s debt be accrued by his/her loan’s interest rate?
A: As of now, the default date to accrue is on the first day of the month.
Q: If I execute the sort command in the masterlist, will the other lists be sorted as well?
A: Yes.
7. Command Summary
A quick summary of all available commands for your easy reference:
-
Login :
login USERNAME PASSWORD
e.g.login userAcc_123 pa$$_Word!@#& -
Login using GUI :
login
e.g. See Figure 1.3:
Figure 1.3 : How the welcome screen looks like after login is entered in the command box
-
Logout :
logout -
Add :
add n/NAME hp/HANDPHONE_NUMBER home/HOME_PHONE_NUMBER e/EMAIL a/ADDRESS pc/POSTAL_CODE d/DEBT [op/OFFICE_PHONE_NUMBER] [dl/DEADLINE] [int/INTEREST] [t/TAG]…
e.g.add n/James Ho p/22224444 e/jamesho@example.com a/123, Clementi Rd pc/123466 d/123 dl/11-03-2017 t/friend t/colleague -
Clear :
clear -
Borrow :
borrow [INDEX] AMOUNT
e.g.borrow 1 500.50 -
Pay back :
payback [INDEX] AMOUNT
e.g.payback 1 500.50 -
Repaid :
repaid [INDEX]
e.g.payback 1 -
Delete :
delete [INDEX]
e.g.delete 3 -
Ban :
ban [INDEX]
e.g.ban 3 -
Unban :
unban [INDEX]
e.g.unban 3 -
Edit :
edit [INDEX] [n/NAME] [hp/HANDPHONE_NUMBER] [home/HOME_PHONE_NUMBER] [op/OFFICE_PHONE_NUMBER] [e/EMAIL] [a/ADDRESS] [pc/POSTAL_CODE] [d/DEBT] [td/TOTAL DEBT] [dl/DEADLINE] [int/INTEREST] [t/TAG]…
e.g.edit 2 n/James Lee e/jameslee@example.com -
Find :
find KEYWORD [MORE_KEYWORDS]
e.g.find James Jake -
List :
list -
Blacklist :
blacklist -
Whitelist :
whitelist -
Overduelist :
overduelist -
Help :
help -
Select :
select [INDEX]
e.g.select 2 -
History :
history -
Nearby :
nearby INDEX
e.g.nearby 2 -
Sort :
sort [ORDERING]
e.g.sort debt -
Add Picture :
addpic [INDEX]
e.g.addpic 2 -
Delete Picture :
delpic [INDEX]
e.g.delpic 2 -
Setpath :
setpath [PATH]
e.g.setpath C:/Users/acer/Desktop/SE/profilepic/
e.g.setpath C:/Users/acer/Desktop/SE/profilepic
e.g.setpath C:\Users\acer\Desktop\SE\profilepic\
e.g.setpath C:\Users\acer\Desktop\SE\profilepic -
Filter :
filter TAG1 TAG2 …
e.gfilter friendly cooperative -
Undo :
undo -
Redo :
redo -
Theme :
theme
8. Current features
-
Adda person (since v1.0) -
Deletea person (since v1.0) -
Have a help screen with detailed instructions (since v1.0)
-
Add tags to contacts (since v1.0)
-
Editcontacts (since v1.0) -
Findcontacts by name (since v1.0) -
Automatic backup storage (since v1.0)
-
Debtfield (since v1.0) -
Prevent duplicate contacts (since v1.0)
-
Logincommand (since v1.1) -
Password masking (since v1.1)
-
Postal codefield (since v1.1) -
Deadlinefield (since v1.1) -
Date borrowedfield (since v1.1) -
Blacklist(since v1.1) -
Full info panel (since v1.1)
-
BanandUnbana person (since v1.1) -
Nearbycommand (since v1.2) -
Borrowcommand (since v1.2) -
Display nearby contacts (since v1.2)
-
Interestfield (since v1.2) -
Sortby various fields (since v1.3) -
Paybackcommand (since v1.3) -
Repaidcommand (since v1.3) -
Whitelistcommand (since v1.3) -
Logoutcommand (since v1.3) -
Person’s debts are automatically incremented according to the interest rate of their loan (since v1.3)
-
Filter contacts by tags (since v1.4)
-
Replace
Phonefield withHandphone,Home phoneandOffice phone(since v1.4) -
List of people who have overdue debts. (since v1.4)
-
A progress bar to indicate how much of the person’s debt has been paid off. (since v1.4)
-
Profile pictures of clients shown next to their details. (since v1.5)
-
Different appearance themes (since v1.5)
9. Features to be included by V2.0
-
Export a person’s contact in another format.
-
Helpcommand that displays screenshots of positive examples. -
View the last login time.
-
Impose different periods of ban on a specified person in the blacklist
-
2FA authentication for login and every other important action.
-
Validity checks on client’s personal information.
-
Send an email notification to the user when the user’s account is logged in from an unknown device.
-
An automated journey scheduler.
-
'Add log' button that generates specific date and time.
-
A file uploading feature.
-
Random generation of a contact from the cleared list.
-
Allow the creation a custom fields.
-
Have unique tag colors for each tag and synchronise tag colors in the info panel with the ones in the person card.
-
Person’s interest field can accept floating point number. As of now, only positive whole numbers are allowed.